Create Purchase Orders (POs)
Introduction to four ways to plan your purchases using Madden

Learn four distinct methods for creating Purchase Orders in Madden Analytics, whether you're using system suggestions or manual entry.
Prerequisites
You have access to the Planning module and the Purchases & Transfers submodule.
Minimum Order Quantity (MOQ) and Lead Time are set for the products you plan to order (you can also set these values when making planning purchases).
A Sales Plan must exist for products where you rely on system suggestions (Methods 1 and 2).
Automated Planning (For Recurring Purchases and Multi-Level Optimization)
This method is the primary tool for generating and optimizing multiple Purchase Orders (POs) over a specified time period. It is ideal for any product where you plan to purchase stock multiple times. That could both be continuously selling items to seasonal products with a sell-through target.
This view is the default planning method and is designed to handle optimization at any desired level of granularity or grouping you filter down to (e.g., Supplier, Category, Brand, Product, or Variant).
The optimization algorithm takes into account individual product settings, such as MOQ and Lead Time, even when planning a large group, ensuring the suggestion is accurate for every variant within the selected time period.
Navigate to the Purchase Plan: In the top bar, go to Planning -> Plan & Buy. Drill down using the hierarchy arrow until you reach the level you want to plan (e.g., Category, Product, or Variant).
Start Editing: In the Purchase Orders section, click Manage.
Input Core Data: Verify or update the required fields such as Min. time between orders, Safety stock/Sell-through targets.
Generate the Plan: Click the Generate button. The system will calculate and display a purchase plan based on your sales plan and the Purchase Plan Settings.

Review and Adjust:
Review the suggested PO quantities. You can manually adjust volumes in the system if necessary.
To ensure you have enough Safety Stock for best-sellers, adjust the Stock Coverage setting in the Purchase Plan Settings.
Handling Segments: If your plan covers multiple segments (e.g., Europe and US), the system will automatically create separate POs for each segment if separate sales plans and warehouses are configured. To plan for only one segment, apply the relevant filter before generating the plan.
Click Save to create the draft PO(s).
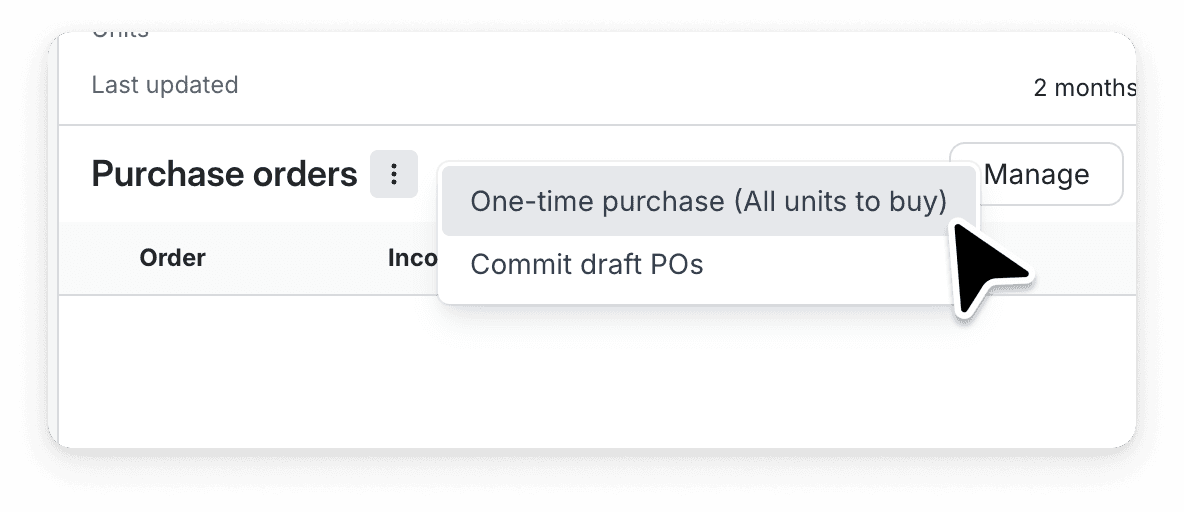
One-Time Purchase (For Seasonal or One-Off Buys)
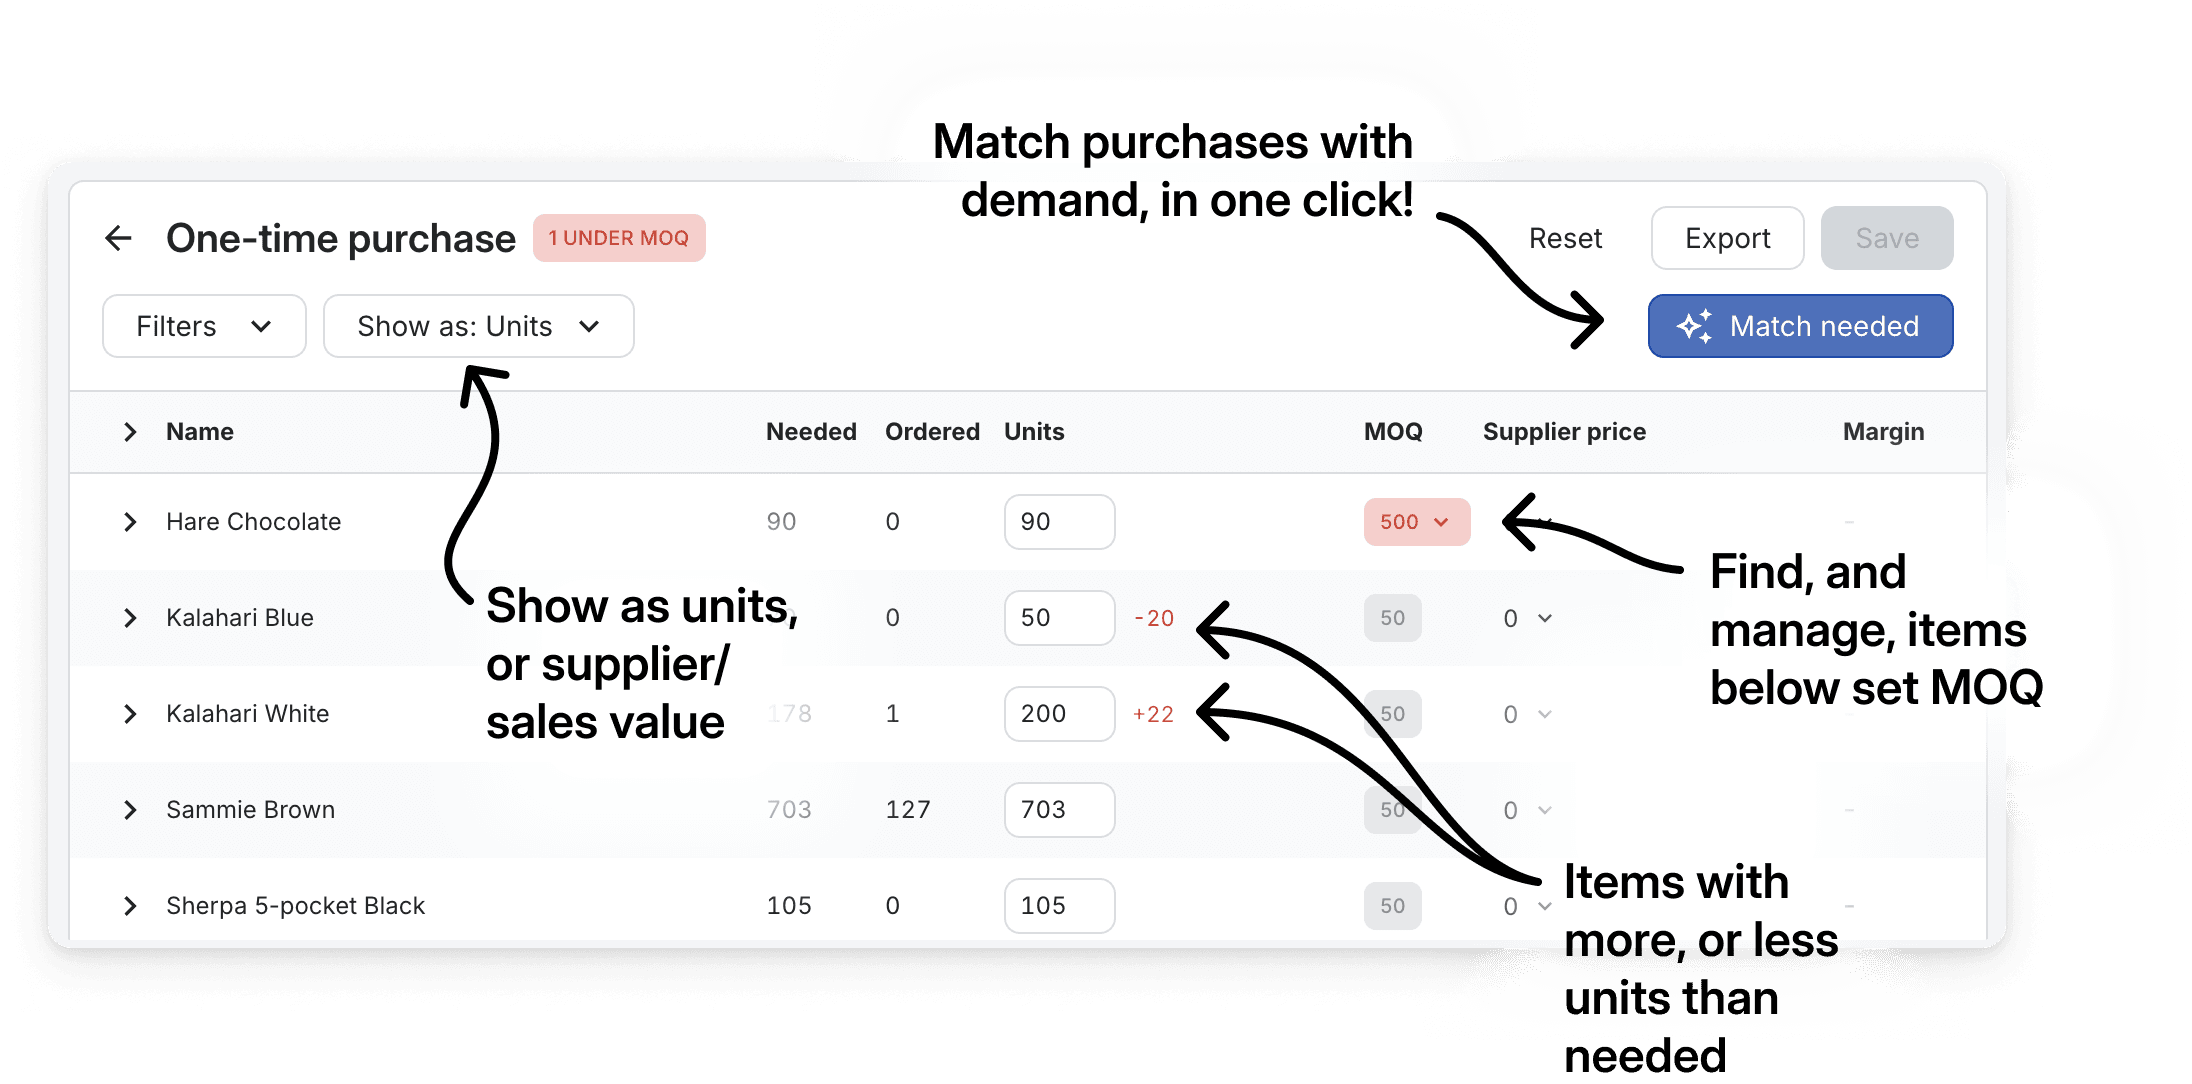
Planning for One-Time Buys: For products where you only plan for a single purchase, like seasonal items, navigate to the purchase orders section and choose the One-time purchase (All units to buy) option.
Easily match your ordered quantities with your calculated need (sales plan + any pre-orders - existing and incoming stock) by clicking Match needed.
Adjusting quantities: This will list all the units you need to purchase according to relevant sales plans, and based on current filtering. Scan through the list to make sure there are no items below MOQ levels.
Clicking Save updates your purchase order for the selected products, replacing existing drafts and creating new ones if needed.
Manage the order details such as order date, estimated arrival date and label to match your need.
Handling Advanced MOQs: This workflow is particularly useful for managing advanced MOQs—whether they're shared across products, specific to a variant, or related to a particular color or fabric—ensuring that all your purchasing requirements are met efficiently.
To edit advanced MOQs, export the provided template Excel file, modify it, and re-upload it.
3. Manual Draft Creation (For Quick, Ad-Hoc Orders)
Use this method when you know exactly what you want to order and don't need system-based forecasting.
Start a Draft: In the top bar, go to Purchases & Transfers. Click Create Draft.

Define Order Header: Select the Supplier and the target Warehouse for the stock arrival.
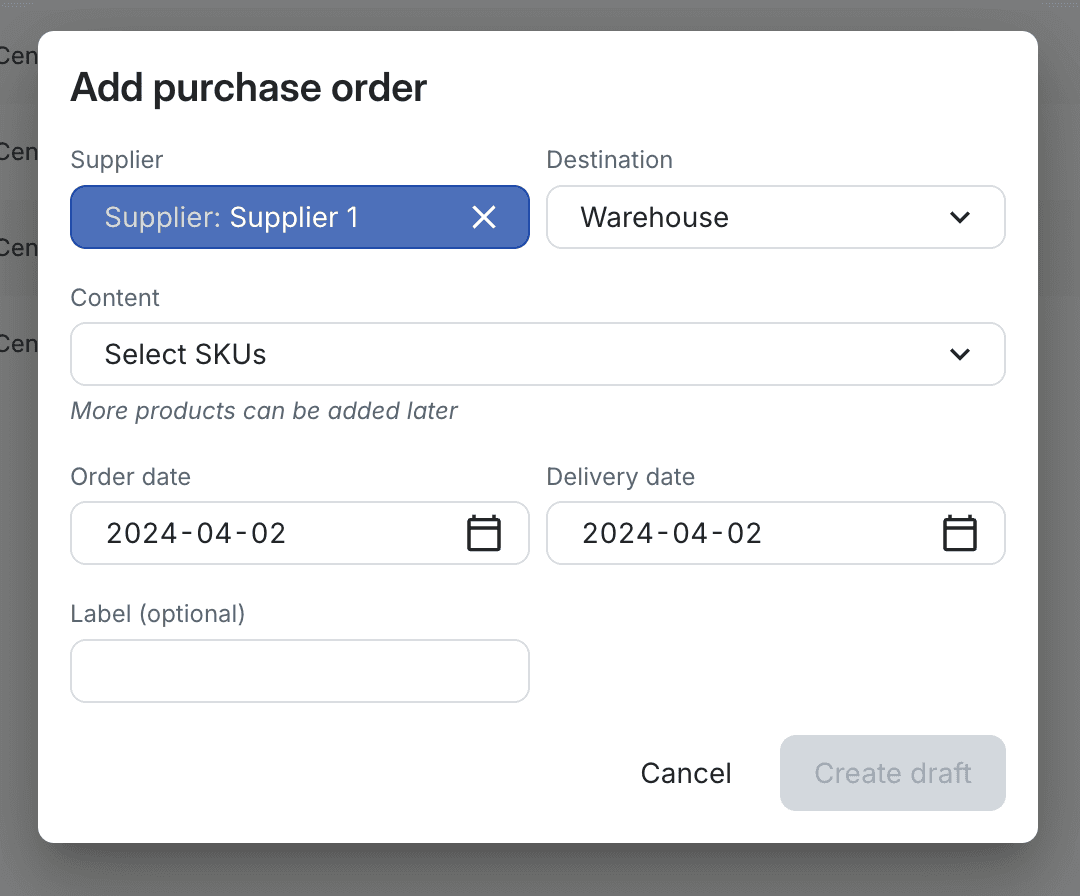
Add Products: Click Add Products and select the specific SKUs you intend to order.
Fill Details and Create: Enter the Order date, Delivery date, and any optional Labels. Click Create Draft.
Input Quantities: In the newly created draft, manually enter the required quantities for each size/product and click Save.
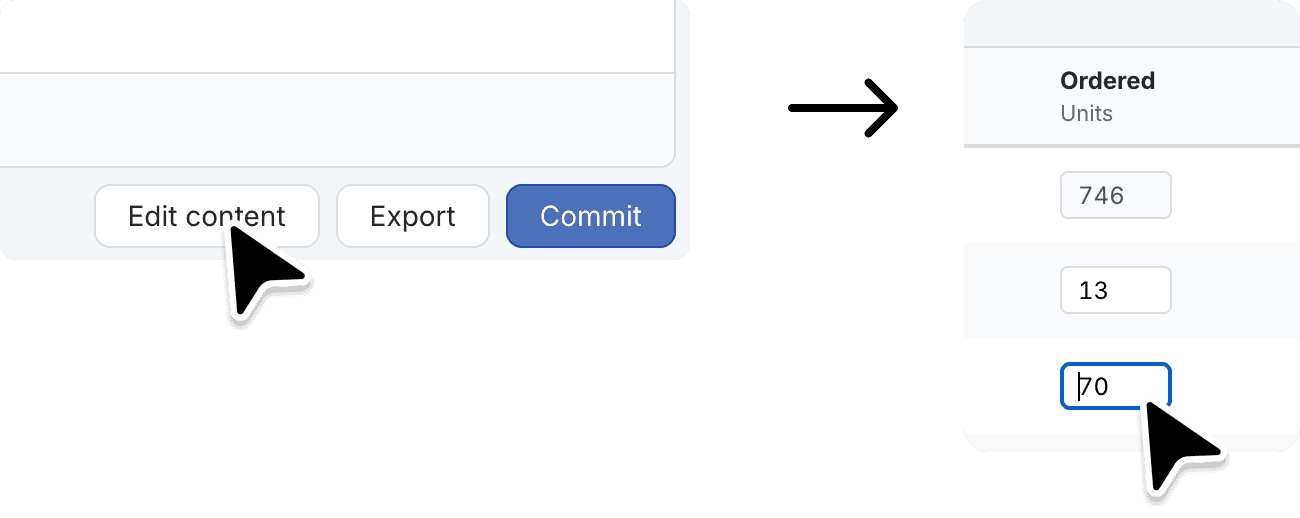
Finalize Order: Once all details are confirmed and correct, click Commit to save the order in the system. Committed orders immediately affect future stock level calculations.
4. Upload from Excel
This method is best for importing orders managed in external spreadsheets.
Navigate to Purchases: In the top bar, go to Purchases & Transfers.
Start Upload: In the bottom-right corner of the table, click Create Draft and then select Upload from file.
Prepare File: Download the provided Excel template. Fill in the template with your order data, ensuring the columns match the required fields.
Upload: Upload your completed Excel file. The system will create a new draft PO containing all the imported items and quantities.
Review and Commit: Review the created draft PO in the system for accuracy, then click Commit to finalize the order.